![knowledge-base-v2.png]](https://help.peardeck.com/hs-fs/hubfs/knowledge-base-v2.png?height=50&name=knowledge-base-v2.png)
Overview
Run your whole Pear Deck presentation seamlessly with Office 365 Teams! In Teams, open your Pear Deck for PowerPoint Online file and start a new presentation Session. You automatically open the private Dashboard View (a Premium feature), which you can use to control the Session and see students' names next to their responses. Open the Projector View, where responses are always anonymous, on a screen in front of the class.
Read through these steps to learn how it all works:
- Start your presentation
- Help students join
- Run your presentation
To use this feature, your school or company needs to have set up a Microsoft Office 365 Teams account and installed the Pear Deck App for Teams.
Steps
Start your presentation
1. Log into your Office 365 account.
2. Go to Apps and click on Teams.
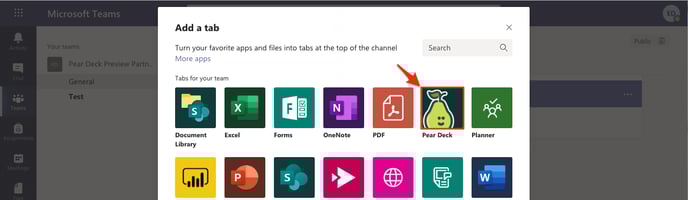
3. With the Teams screen open, click on the new tab button.

4. In the Teams apps menu, select Pear Deck.
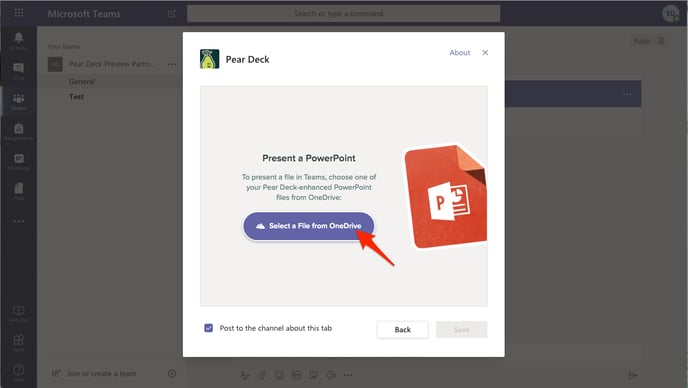
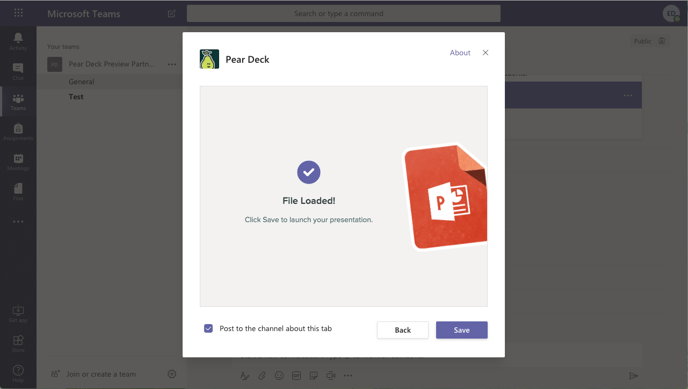
5. Click Select a File from OneDrive to choose the file you want to present.
6. In the file picker, select the file you want to present with Pear Deck.
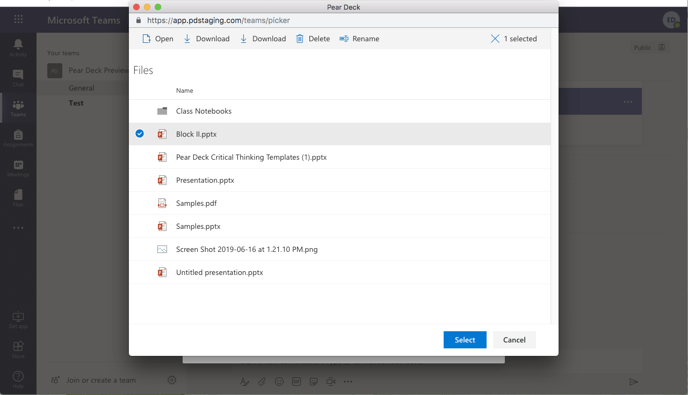
7. Once the file has loaded, click Save to launch your presentation.
8. Voila! Your presentation has begun and your Dashboard is open in a tab. You can use it to run the presentation and see students' responses in real time. Learn more about what you can do with the Dashboard. Responses from this Session are saved automatically in your Sessions menu.
Help students join
How students join the Session depends on whether they are already added to your Teams environment. Students can join whether or not they are already in your Teams environment. Here are the two ways for them to join:
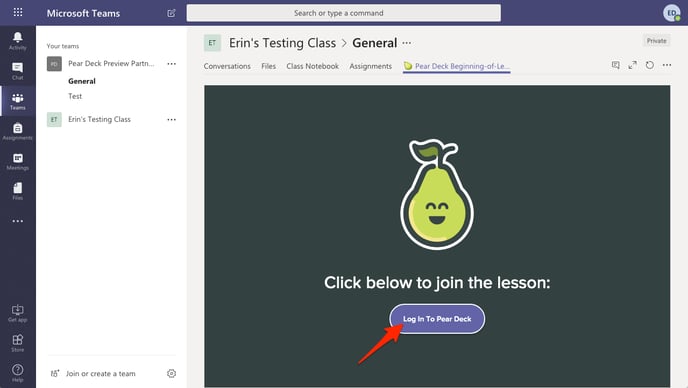
1. Students who are already in your Teams environment do not have to enter the Join Code! They just navigate to Teams, click on the presentation tab, and click the Log into Pear Deck button to join your presentation.
2. Students or participants who are outside of your Teams environment can definitely join your Session, but they do need a Microsoft Office 365 account. Here’s how to get them into the Session:
- Click on the Open Projector View button. This opens the Projector View of the presentation in a new tab.
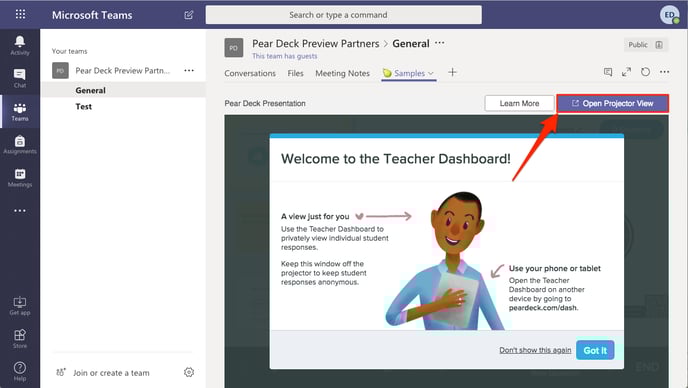
- Remember, the Projector View always displays students' responses anonymously, so this is the View you want to display in front of class. Learn more about the Projector View.
.png?width=688&name=Drawing%2c%20map%2c%20grid%20on%20projector%20(2).png)
- Now, students can join the presentation on their own screens They go to joinpd.com, enter the Session Join Code from your Projector View (which is vbkwd in the image below) and log in with their Microsoft Office 365 accounts.

No matter how students join your presentation, their slides will sync up to yours, and they will be able to answer any Interactive Questions you've added to your presentation.
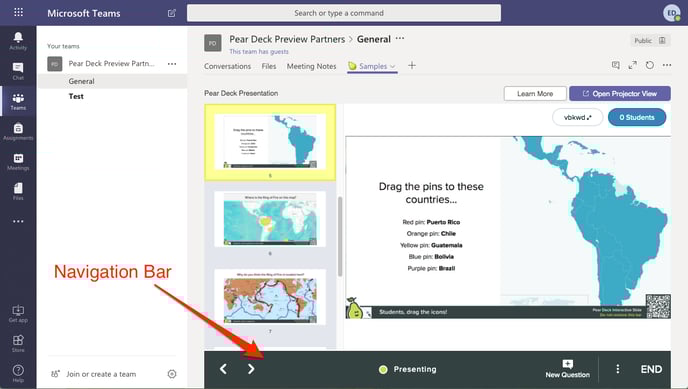
Run your presentation
The Dashboard and Projector Views automatically sync up. You can use the Navigation Bar in the Dashboard to move through the slides - the Projector and the Student Views will follow. Click here to learn more about what you can do with the Navigation Controls!